5 STEP BY STEP GUIDE TO STRIPPING AND WAXING FLOORS

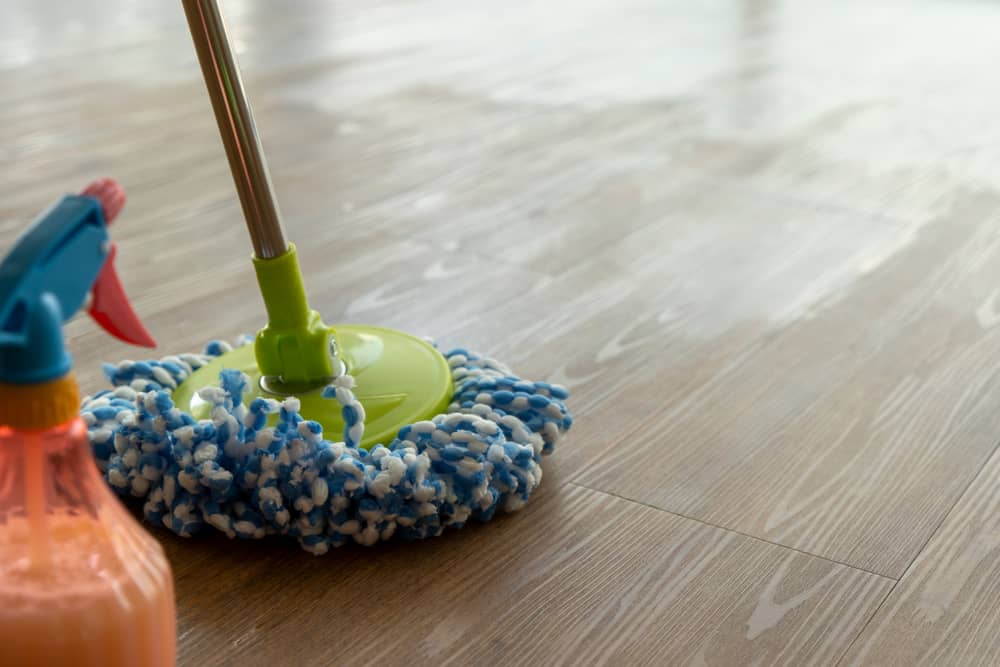
Floor strip and wax is the new trend the cleaning industry is swearing by. It not only cleans your floor at every nook and corner but also makes sure that each corner of the floor restores its shine and luster. Who doesn’t want a scintillating floor to boast of at the end of the day or to make themselves feel good about their home while hosting a party!
Floors are the forebearer of every kind of dust and dirt that we happen to bring along with us from the outside world. From the lingering mud on our shoe soles to the wetness we spill on them, the food spills to the mess the kids and pets create. Just imagine the kind of torture our floors go through on a daily basis. This is the sole reason we ought to keep them spic and span and clean them regularly to keep the dirt at bay.
But what happens when the floors lose their shine and sparkle to those harsh chemicals we use on them to get rid of the dust on a regular basis?
This is exactly why and when the floors strip and wax come into the limelight to bring back their charm and sparkle and to keep them shining bright in the long run.
Floor strip and wax is the new trend the cleaning industry is swearing by. It not only cleans your floor at every nook and corner but also makes sure that each corner of the floor restores its shine and luster. Who doesn’t want a scintillating floor to boast of at the end of the day or to make themselves feel good about their home while hosting a party!
Floor waxing gives your floor a bright glossy look and hides away the blemishes and scratches perfectly to run for quite some time. But this is a temporary application that comes off with time before it is stripped off again to apply a new coat of wax.
In this blog, we will discuss exactly how a floor is stripped and waxed to give out that glossy look.
Purchasing appropriate floor wax and strippers
The first and foremost step is to make sure of getting an apt floor wax and strippers going by the type of floor that you have. Think and ensure if you want a solid or liquid floor wax. Liquid wax can be applied with a mop, but it can be quite messy, while a solid wax needs more arm strength since it is applied using the hand and cloth. Apart from this, also make sure whether the wax you choose is meant for floors and not furniture if you have a wooden floor because furniture wax happens to be a lot slippery while a floor wax is more buffable.
As for strippers, some floors such as hardwood can be damaged by certain kinds of strippers.
It is a significant first step to get yourself the appropriate floor wax before you start working on the floor.
Strip the Floor
You would obviously need space to strip your floor and wax. Clear out the furniture and other items from the room before stripping your floor. Wear a mask to safeguard yourself from inhaling those toxic fumes. Wear gloves to protect your hands and you are all set to strip off your floor and restore its shine. Just follow the following procedure for error-free stripping.
- Start to apply from the far end of the room and take into account a small area to avoid unnecessary hassles. Start with a 2by4 feet plan if you are applying wax with your hand. You can definitely choose a larger section of your floor if you plan to use an electric run scrubber.
- Use a dry-wet vacuum or an electric floor scrubber to remove the stripper. Some people do not possess such intricate tools and hence, professional strippers come in handy.
- Mop the area with a wet mopper to make sure every spec of excess stripper is removed and then follow up with a dry mopping to double sure that no dust lingers around before you proceed to wax your floor.
- Repeat in tough areas if required.
Proper Ventilation and drying
Open every door and window in the room to get rid of the nasty smell that comes with floor strippers. Good ventilation is very important before you move to the next step of waxing your floor. But make sure, the screen to the windows is closed so that wind-blown dust flies back into the room and settles back on your floor. You also need to ensure that your floor is well dried before you can start waxing it. Generally, the floor takes around 1 hour to dry off with the stripper, but you can always speed it up with ceiling fans and dryers.
Apply Floor Wax
Once you are sure that your floor is absolutely dry, you can move ahead with the application of floor wax. Make sure you follow the instructions mentioned on the wax bottle or carton by the manufacturer. For more detailed guidelines, follow the steps discussed for that immaculate wax on your floor.
- If you have chosen a liquid wax, a mask and a pair of gloves are enough safety tools for yourself, but in the case of solid wax, adorn a knee cap to protect your knees.
- Start with small sections, similar to how you have started with stripping the floor. Choose 2by4 feet for your convenience.
- Pour the wax on the floor and even out with the help of a putty knife and cloth.
- Repeat and apply a few more coats of wax if you feel the need and are not happy with the outcome. Or follow the directions of the manufacturer if this is your first time waxing your floor by yourself and you have no clue as to how to process or what the desired outcome would be after drying up.
- Allow the coats in between to dry up completely before going for a reapplication.
Buffing of the floor
The final step in floor waxing is the buffing stage where the applied wax is polished to bring out the accrual shine to your floor. Make sure the wax applied to the floor is completely dry before you move to this stage. Once the wax is dried up, use a soft cloth, preferably a towel or a mopper to buff in a circular motion if buffed by hand. As an alternative, you can always go for a buffing machine. But buffing machines come costly and are generally used by professional cleaning service providers.
Once you are done with buffing, leave your floor for eight hours, before you step on them or decide to move in the furniture.
Tips for maintaining a waxed floor
While waxing a floor can be a strenuous job, maintaining the shine of the wax for a longer time is next to level tough. You need to keep in check certain DOs and DON’Ts for your floor to scintillate for the longest.
- Try not to step on your floor with your shoes on. The dust adhered to the shoes takes away the gloss much swifter from the floors than otherwise.
- If certain areas start to wean off the shine, take a small cloth and spot-buff the area immediately.
- Try to re-wax the floor every six months to one year for your floor to maintain its shine and never look dull.
DIY Floor Waxing v/s Hiring a Professional
With the right tools and guidelines and a little bit of skill, floor waxing is achievable if tried at home with DIY ways, but it is always preferable if you chose a professional service for the right way to do the job. With their expert knowledge and experience and the right set of professional tools, your floor will shine to glory just the way they deserve.
For Professional help, search for the floor waxing services near me and enjoy your floor getting revamped as they restore its brightness.
More Posts

Top Gym Cleaning Trends Every Fitness Ce..
How Professional Cleaning Enhances Luxur..
Why Professional Carpet Cleaning Service..

Top Commercial Cleaning Trends Businesse..

The Complete Post Construction Cleaning ..
How Professional Office Deep Cleaning En..
